How to visualise your own fabric on a clothing design
The short answer
To visualise your own fabric on a clothing design, prepare a clear fabric photograph or artwork file, record its real-world scale, and apply it to a consistent garment concept using a tool that supports fabric or image references. Check the result against the original material for colour, motif size, orientation and placement. Use the preview to explore appearance, then assess the physical fabric before approving construction.
For designers and textile artists, this can make a useful question easier to answer: does this fabric work visually with this particular garment?
The quality of that answer depends on what you supply and what you check afterwards.
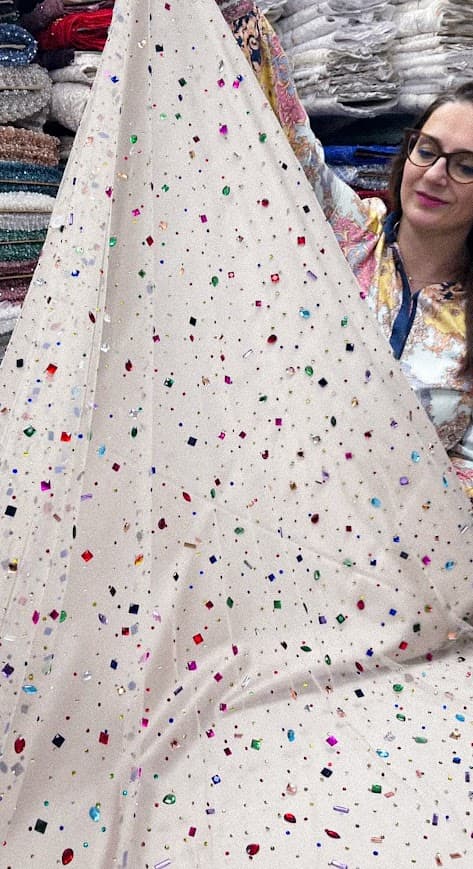
What do you need for a fabric visualisation?
Gather the following before you start:
| Input | Why it matters |
|---|---|
| Fabric photo or artwork | Shows the colour, motif and surface appearance |
| Scale reference | Establishes the real size of the motif or repeat |
| Garment concept | Defines the silhouette and visible design details |
| Material information | Records composition, construction and weight where available |
| Placement notes | Explains print direction and any deliberate motif positioning |
| Physical swatch | Supports later decisions about colour, feel and suitability |
A photograph can describe appearance. It cannot, by itself, provide all the information needed to establish how a fabric will behave in a garment.
Photograph enough fabric to show the pattern
Lay the fabric as flat as practical and photograph it straight on in even light. Avoid strong shadows, glare and filters that change the colours. Take a wider image showing the overall pattern and a closer image showing texture.
If the material has a large print, a tiny swatch may omit the relationship between motifs. Include enough of the fabric to show that relationship, or ask the supplier for a repeat image and its dimensions.
Keep one photograph with a ruler and another clean reference without it. The ruler helps document scale; the clean image is useful for visualisation without accidentally introducing the ruler into the result.
If you are working from original textile artwork, retain the intended print dimensions and distinguish a repeating pattern from a single placement graphic. Keep the source file separate from any edited preview.
Specify motif size and repeat size separately
A motif is an individual element, such as a flower. A repeat is the unit of pattern that repeats across the textile. They may have different dimensions.
For example, an illustrative fabric note could say:
Illustrative fabric note
The largest flower is approximately 18 cm wide. The full repeat is 60 cm wide by 70 cm high. Preserve the large flowers and the open background between them. The print runs in one direction.
Those measurements are an example, not specifications for an actual MadeApt fabric.
Without scale information, a preview might cover a dress in many small flowers when the real textile would show only a few large ones. That changes the visual character of the garment and the client’s expectations.
Supplying dimensions does not guarantee that a generative tool will obey them. Check the output and retain the measurements in the written design record.
Keep the garment stable while comparing fabrics
Choose one garment concept with a clear silhouette and visible seams. Keep its neckline, length, sleeve shape and proportions consistent across the comparison.
Then vary the material. This makes it easier to compare a large floral, a fine stripe and a plain colour without also deciding between three different dresses.
A useful instruction for a visualisation tool might be:
Suggested instruction
Use the supplied garment as the design reference. Keep the silhouette, neckline, sleeves and hem length consistent. Use the supplied fabric image as the surface reference, preserving its large motif scale and upright direction. Treat the result as a concept preview.
This is a suggested instruction, not a guarantee of any tool’s output. Review the garment as carefully as the textile after each edit.
Check the preview against the source fabric
Compare the two side by side. Look for changes to the motif, background colour, print density and direction. Check that the preview has not invented embroidery, lace, shine or transparency that the actual material does not have.
Look closely around seams, darts, gathers and pockets. A generated image may show a motif flowing continuously across areas that will be cut and sewn separately.
If precise placement matters, write it down and discuss it with the maker. For example, “centre one large motif on the front bodice” is a placement request that needs checking against the pattern pieces, available fabric and cutting plan. A smooth-looking render does not confirm that arrangement is feasible.
Understand the difference between appearance and drape
A surface preview helps communicate colour and pattern. Predicting the way a garment hangs requires additional information about the material and garment construction.
CLO’s documentation treats material appearance and physical behaviour as separate aspects of digital fabric. Its physical settings interact to determine the simulated garment behaviour. This is why applying a fabric photograph is only one part of building a meaningful 3D fabric representation. CLO fabric guide (opens in a new tab), physical property settings (opens in a new tab)
For an early concept, it is enough to label what the preview establishes: perhaps print scale and overall colour direction. Before making the garment, ask the maker to assess the actual fabric in relation to the proposed shape, support, lining and intended movement.
Approve the physical material before cutting
Use a physical swatch or sample length to check the material in relevant lighting. Assess its opacity, feel and behaviour with the proposed lining where necessary. Ask the maker which further tests are appropriate for the garment and its care requirements.
Keep the approval record specific: supplier and fabric reference, selected colour, approved swatch, print direction and any agreed placement requirements. If the fabric changes later, revisit the design assumptions with the maker.
The preview remains a communication aid throughout that process. The actual material and agreed construction determine what is made.
Frequently asked questions
Related guides
how to present clothing design options to a client before sampling
An agreed brief, a small set of comparable concepts, visible fabric decisions and a recorded approval.
from fashion concept to first sample: what your maker actually needs
The brief, material decisions, fit information and agreed scope a tailor or sample maker needs.
can I supply my own fabric for a custom garment?
What a maker needs to know about the cloth you bring, and how quantities and suitability are checked.
Explore your fabric and garment idea with MadeApt
MadeApt helps people explore garment concepts and refine design directions with a path towards human making. Start with our fashion collection design page, keeping your fabric reference and its dimensions ready for the design discussion.
If you are a designer or textile artist looking for a studio workflow, express interest in MadeApt Tech. Tell us whether you need help with client previews, textile concepts or the move from a selected idea towards a real garment.